(1) What technology/technologies you would choose to use? Why do you choose to use the technology/technologies?
In my lesson I want to incorporate 5 different technologies which would be used in a unit plan that would span the entire school year. The students would be using blogs as a way of reporting findings they have for the lesson. They would use google earth to locate specific areas around the world that they may not be familiar with. A class Delicious site would also be created as a way for me to monitor the resources the students are using for research. The students would also be using google calendar in conjunction with a wiki space to create their final project for the unit. I choose these technologies because they are fairly easy to use for beginning students. Blogs are important for social reasons and help to encourage students to express their ideas. Google earth is helpful for content to life and allows students access to visual images of places they have never been nor heard of. Delicious is especially important because it gives students the practice for researching information while allowing the teacher to be in control of what information the students are accessing. Google calendar and wikis are great tools to help students organize information they find and share it with others in a concise way.
2) What specific content would you like to teach with the technology/technologies? What specific pedagogical goals would you like to achieve?
The main content topic for this unit plan is weather and weather patterns. The students will be using the technologies to record weather patterns and make weather predictions for various cities around the world. My goal is that students will begin to see how technology can help them gain access to information that they otherwise would not be able to find easily. Also, I want my students to see the importance of sharing information and how technology can be used to help them express information they find to anyone they want and not just someone in the same room. I would like to incorporate parents into the unit plan by encouraging them to read and respond to students’ posts so that the students can see how easily their ideas are shared. In terms of the content goals, I want students to understand the relationships between where a place is located and the weather that place experiences throughout the year. With the help of the technology, my goal is that the students will begin to notice patterns on their own so that they are building their own learning to make the information presented more meaningful.
(3) What is your specific lesson or unit plan?
This specific unit plan will take place over the course of the entire year. The students will be using the internet to track weather conditions for a particular city in the world from the first couple weeks of school to the last few weeks. The students will be split into 5 groups. Although each student will have a different city, all of their cities will have similar weather conditions. The students will use google earth to locate their cities and record the location. The groups are separated into 5 groups so that as the teacher I can meet with one group each day (groups meet once per week) to help them with their weather recordings. The students will each have a blog where they post the weather conditions for the week and predict the weather conditions for the following week. Parents will be encouraged to read the blogs and share information with their students. Toward the end of the first semester and into the second semester, the students will begin to research things to do in their city through the resources provided on the class Delicious page. Information that the students find important will also be recorded on their blog. During the last few weeks of the year, the students will look back over their weather conditions from the year to determine when the best time would be to plan a day vacation. The students will make a google calendar to highlight the day that they chose and record what the expected weather conditions would be for that day. Each group will make a wiki page with a page dedicated to each of the different cities. The groups will meet and talk about the similarities in weather and what they noticed about weather conditions. On each of their pages, the students will add pictures and information about what the vacationer can do during their day in the city. Each group will share their wiki page and the class will vote on where would be the best city to vacation based on the things to do and the weather conditions. A wrap up will be completed by the teacher that will help the students to notice patterns in weather conditions between all of the cities and the students will begin to understand how the location of a city affects the weather conditions throughout the year.
Monday, April 6, 2009
Sunday, April 5, 2009
podcasting
This mini-lesson is designed for a fourth grade class. The GLCEs that are met include:
Describe ways in which the
Use a case study or story about migration within or to the
Explain probable consequences of an absence of government and of rules and laws. (
The lesson will progress by having the students first listen to the audio introduction and then watch the Michigan History Video.
Podcasting is a very beneficial tool to use in the classroom. Students can use podcasting to enhance powerpoint presentations by adding an audio aspect. By having the students record their voice, some of the anxieties of oral presentations are taken away. Also, students who don't have access to a video camera but have a regular digital camera can make movies using their voices in order to create a video with the pictures in photostory3. Students can use podcasting to summarize what they learned from a fieldtrip and they can also be used to complete jigsaw presentations of class content. Podcasting can also be utilized by teachers to create informational videos from information that they want to include. Many times teachers find videos about class content that cover too much or too little about the information they wish to cover. However, with podcasting, teachers can create their own audio/video presentations that they can tailor to their particular classrooms. Podcasting helps to personalize classroom content and can help teachers and students presenting learning in a fun and interactive way.
Tuesday, March 31, 2009
Wednesday, March 4, 2009
Citing Digital Images
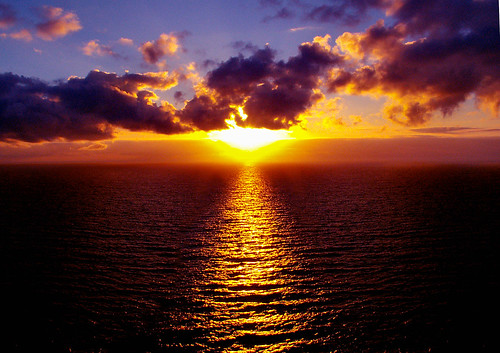
Photo Attribution:
Original Image: Bedruthan sunset
http://farm1.static.flickr.com/128/353250218_404318ff36.jpg
By: Ennor
Released under an Attribution-Non-Commercial-Share Alike License
http://creativecommons.org/licenses/by-nc-sa/2.0/deed.en
Before this week's assignment the first thing I would have suggested to my student would be to do a google image search. This is the way I have searched for images ever since I started and I didn't know any other way. The problem with google image searches is that sometimes there are images displayed that are completely unrelated to what you are searching for and some can be very inappropriate. If the student needed images that could be clip art, I would suggest that they search for clip art under the subject that they want on Microsoft Word. If the student asked me how to cite the picture I would have told them just to cite the website that they got it from using MLA or APA style. I never knew there was a formal way to cite a picture so I wouldn't have been able to send that knowledge on to my student.
Now... I would have my students use the creative commons site. At the site there are still links to google images, as well as other browsers images so it can expand the amount of results that the student could get. I would also suggest this site because it is easy to navigate and I would know that the pictures were legitimate. Creative Commons also makes it easier for students to be able to site the pictures they use so that they don't run into problems with copyright. Although I have never had problems with copyright laws it makes me nervous now that I have used hundreds of images from the internet without giving the author credit. With the growing involvement of the digital world in the classroom, I think it is crucial for students to know how to credit all of the sources they use. I would show my students how to correctly cite an image using the example posted above.
Sunday, March 1, 2009
Rock Cycle Photo Story

I chose to create a digital story that I would use as a teacher to present to my students. I have been interested in this form of lesson since I was asked to create a digital story in my TE 401 class last semester. I ended up using a digital story about Michigan Statehood in a lesson I taught to a fourth grade class. It is really beneficial to be able to incorporate visual and oral stimuli into a lesson and this is what the digital story offers. The first time I created a digital story I used a different program. This was my first time using VoiceThread. At first it was confusing, however as I became more familiar with the website it was pretty straight forward to use. I think the VoiceThread tool is great for first time photostory creators and I like that you can also incorporate video into the story, even though I didn't chose to try it.
There are many different things that teachers can use photostory programs for in their classrooms. Not only does it create a orally and visually stimulating lesson tool, but it is also something that can be used by students. In many classrooms that I have been in, teachers incorporate jigsaws, in which groups of students are responsible for teaching a topic to the rest of the class. A photo story could be used by students to teach their topic while including their voices into the presentation. Sometimes students have trouble speaking in front of the class and this could be a good way for them to transition. By recording ahead of time, some of the anxiety is lessened. I can see photostories taking the place of powerpoints in some situations because of the extras that can be added, such as voice and video. Teachers can also use photostories to highlight student work to place on a blog for parents and administrators. The opportunities are limitless, teachers just need to do some exploring.
Saturday, February 21, 2009
World War II Map Mashup
View Larger Map
This map mashup could be used with a variety of different age levels by adjusting the amount of information and detail provided about the events. However, for the age level I have planned this map mashup would be used with students in either 5th or 6th grade. This map would be used in a social studies class during a unit on World War II.
I think the main idea that students could gain from using this map is the location of each of the major events during World War II to where they live. When I first learned about World War II, especially the attach on Pearl Harbor, I never realized how close Hawaii was to Japan. I think this map will help students see the the proximity of Hawaii to Japan, and Hawaii's distance from the United States main land made the island a prime target. I also think this map helps to show students that the war really was a world war. Too often I feel that students assume the war only took place in Germany because of the emphasis on the Holocaust. In fact, there were many battles in many different countries and there were a lot of countries left damaged and hurting after the war. The links to pictures help to bring the map and ideas to life to give students an idea of the affects the war had on those involved. I also love the link to GoogleEarth because it shows students what the areas where battles took place look like today. Some students may not realize how populated places like Hiroshima, Japan are until they look at the map of the buildings and roads on GoogleEarth. Although there are probably more people in Hiroshima today than there were in 1944, it still helps students to understanding when the dropping of the atomic bombs claimed so many lives. I would use this map to let my students explore where different events took place. It is one thing to talk about different countries across the Atlantic and Pacific Oceans, but once they have a chance to see these places it will help them to connect the information that they are learning.
Thursday, February 12, 2009
Organizing the Internet
I have always enjoyed the use of technology for classroom lessons. Students are always excited to do something different from the traditional day to day lesson. As I explored some online resources that would help me get students excited about the information, I chose to focus my lesson unit on plate tectonics. I found several very good interactive sites that would enhance the students' understanding of the concepts. This lesson unit would be completed with a sixth grade class and I hope to have the opportunity to carry it out at some point in my career.
The GLEC's and METS targeted for this unit include:
E.SE.06.51 - Explain plate tectonic movement and how the lithosphere plates move centimeters each year.
E.SE.06.52 - Demonstrate how major geological events (earthquakes, volcanic eruptions, mountain building) result from these plate motions.
E.SE.06.53 - Describe layers of the Earth as a lithosphere (crust and upper mantle), convecting mantle, and dense metallic core.
Basic Operations and Concepts #4 - Understand that new technology tools can be developed to do what could not be done without the use of technology.
Technology Productivity Tools #2 - Use a variety of technology resources, including the internet, to increase learning and productivity.
On my delicious site, you can see the resources I have chosen to complete this unit under the tab Plate Tectonics Unit.
This unit will be completed over a week time frame. The calendar below gives a brief overview of what will be covered on each day.
Day 1 of the unit covers the information about the layers of the earth with a heavy focus on the liquid convecting mantle. This layer of the earth is the main source for plate movement on the earth's surface. The website The Restless Earth: A Geologic Primer provides very helpful information about each of the layers of the Earth and what effect they have on plate tectonics. There are cross sections pictures to help students visualize what the Earth's layers look like and how large each layer is in comparison to each other. This site provides students with much of the background knowledge they will need to understand the further instruction of the day's lesson involving the convection cycle of the liquid mantle as well as for the rest of the unit.
Day 2 of the unit covers the different kinds of plates that make up the crust of the Earth. There are continental plates and oceanic plates. The students will use an interactive website to help them visualize the many different plates of the Earth and where the plate boundaries are. The student will also be able to see how these boundaries have changed over time and can also click to see areas of volcanoes and earthquakes to help them identify the types of plate movement taking place in certain areas.
Days 3 and 4 of the lesson will introduce and discuss the three different types of plate movement. The students will use the USGS website to find detailed information about the three types of plate movement as well as visual representations. This site also provides students with maps of where each type of movement usually occurs on the Earth and the types of landforms that are created from each. The students can find where hot spots are and why they are caused. The USGS website will be primarily used on day 3.
On day 4, the students will continue their understanding of the different types of plate movement and the landforms that are formed as a result. For their exploration they will use the interactive website Mountain Maker, Earth Shaker. The students can get on the website and drag arrows to show different types of plate movement. As the students drag the arrow, the diagram moves the earth to show what the plates do as they are moving and how the landforms are created. As they do this, a description of the movement shows up below the diagram and a map comes up of where this type of plate movement occurs. This site can really help students to visualize what is happening above and below ground simultaneously.
On day 5 of the unit the students will use GoogleEarth to identify the locations of the different landforms caused by plate movement around the world. As a group they will work to find an example of each type of plate movement and the resulting landform. They will record the location using latitude and longitude and share their results with the class. After everyone presents the students will use the precise locations from GoogleEarth to see if their landforms are in similar locations. This will help students to see the actual landforms in 3D and will help them to make the connection of why landforms form where they do.
Subscribe to:
Posts (Atom)


